I'm working on an idea for my own BMS (battery management system), here is some details on my initial research:
last night I started prototyping with this device I purchased ($20)
http://www.rfduino.com/product/rfd22102-rfduino-dip/
I originally purchased an adafruit BLE shield to use with a Arduino
Micro/Trinket but I broke it during assembly/testing. So the RFduino
will be the first proto child.
Step 1 initial software setup: I got the RFduino loaded up with a
template "sketch" software and broadcasting from a standalone battery.
the template looks similar to this: https://github.com/RFduino/RFduino/b...e/Template.ino
Step2: communication: Got the free tester Android app installed and was
able to send and receive data to my phone. link to Andriod tester: https://github.com/lann/RFDuinoTest/releases
added code to Arduino sketch code template:
void RFduinoBLE_onReceive(char *data, int len)
{
// anytime we receive a char from Andriod we send back the only useful data we have at the moment
//read pins 5 and 6 and report integer from 0 to 1023
int vlt;
vlt = analogRead(6);
RFduinoBLE.send(vlt);
vlt = analogRead(5);
RFduinoBLE.send(vlt);
}
step3: measure something real and report.
I learned the microcontroler cannot measure it's own supply voltage
without help. Either use a voltage divider or an external reference.
The divider formula is?
Vout = Vin * (R2 / (R2 + R1)) *edit* due to voltage sag this could be
too innacurate except in comparing relative readings across all cells.
For any decisions on shunting/balancing, we would need to multiply and
regulate the supply? so measurements can be useful.
step4: see if the measurement can be added to the bluetooth broadcasted
device name so there is no connection needed and the andriod device can
simply scan all device names, then pick one to connect to when desired.
eg.
RFduinoBLE.advertisementData = "vCell1"; //but real voltage in there somewhere
Tuesday, December 9, 2014
Friday, November 21, 2014
round trip to work
I drove the 32 miles round trip to work without any charging along the way.
Last night my daughter had to rescue me by following me home in the dark with her Camry since my car reportedly had "no taillights" which turned out to really be "dim taillights". So I need to put new clean connectors on along with the LED taillights I recently purchased but have not yet installed. This weekend!
josh
Tuesday, October 14, 2014
Rear battery boxes
I completely scrapped the location of batteries in the rear passenger
seating area. This poses two problems, first batteries favorite
position is not laying sideways but standing upright. Second the
limited space made me forget about padding and the batteries were fixes
very tightly. I've since learned that someday somewhere in some car, a
battery will bloat, and if there is no side to side room whatsoever,
cracking may ensue. Finally having 4 cable runs to facilitate 4
locations for blocks of batteries is hard to deal with from a BMS
standpoint, and also could cause minor issues with charging. In short
complication rarely pays off. So keeping 26 cells in the front for now,
everything else will go in back.
Just starting new rear boxes:

Bending metal with break thingy...
Rubber mounting, I got some flat rubber , kinda looks like tire rubber but has thread instead of steel inside it.

Unexpected Feline Supervisor:

comparision of welded boxes to bend metal with no sides yet:


I cut a massive hole in the rear trunk area sheet metal of my Cortina, where the old gas tank hole was. The new much larger hole runs in-between the leaf springs and just behind the rear differential.
Cut, bent and welded a bunch of 16 gauge steel sheet (wore a respirator for the galvanized pieces). Thus creating 5 horizontal boxes which hang down 5 inches from the original trunk floor. The boxes hold horizontal parallel rows of batteries, which finally appear like one square pack, except for a small gap for the final row making room for the leaf spring shackles.
The leaf does not pass under the boxes, the edges of both are 1 inch apart.
I also removed the leaf springs and delivered them to Denver Spring company to have one leaf added. I had previously lengthened my spring shackles which made my car driveable but the leafs were flat, not good.
I have not painted the boxes, some are galvinized which helps but some are raw steel and need primer. Plus all the cracks etc need foam padding and/or some method of sealant.
Then finally a magic wand is needed to create "the perfect lid", for starters that will end up being some plywood lined with foam from the battery shipping boxes.
Just starting new rear boxes:
Bending metal with break thingy...
Rubber mounting, I got some flat rubber , kinda looks like tire rubber but has thread instead of steel inside it.
Unexpected Feline Supervisor:
comparision of welded boxes to bend metal with no sides yet:
I cut a massive hole in the rear trunk area sheet metal of my Cortina, where the old gas tank hole was. The new much larger hole runs in-between the leaf springs and just behind the rear differential.
Cut, bent and welded a bunch of 16 gauge steel sheet (wore a respirator for the galvanized pieces). Thus creating 5 horizontal boxes which hang down 5 inches from the original trunk floor. The boxes hold horizontal parallel rows of batteries, which finally appear like one square pack, except for a small gap for the final row making room for the leaf spring shackles.
The leaf does not pass under the boxes, the edges of both are 1 inch apart.
I also removed the leaf springs and delivered them to Denver Spring company to have one leaf added. I had previously lengthened my spring shackles which made my car driveable but the leafs were flat, not good.
I have not painted the boxes, some are galvinized which helps but some are raw steel and need primer. Plus all the cracks etc need foam padding and/or some method of sealant.
Then finally a magic wand is needed to create "the perfect lid", for starters that will end up being some plywood lined with foam from the battery shipping boxes.
Thursday, September 11, 2014
It's been a while since the last post, but there has been LOTS of work done. Mainly with updated motor mounts, and purchasing an industrial strength motor adapter and coupling. Also finally getting the flywheel sorted out and balanced. Building my own engine hoist, organizing my garage! (an ever ongoing cause). Got temp registration, etc. Pictures coming!
Sunday, August 17, 2014
Has been a busy few days!
Has been a busy few days!
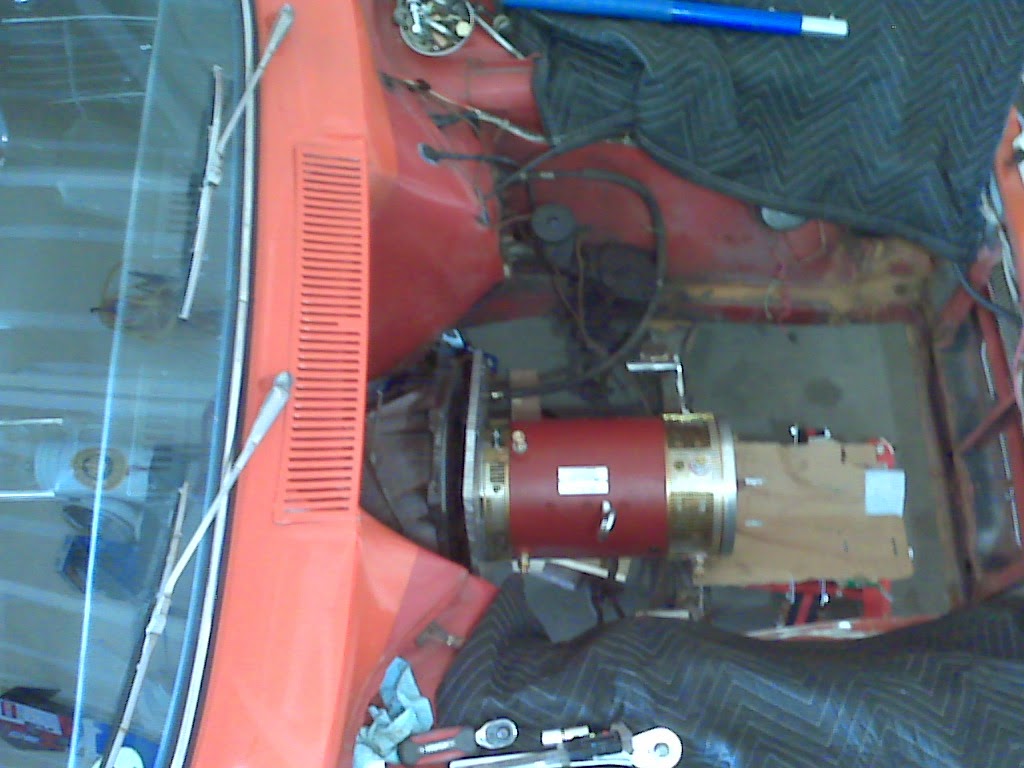
Mounted accelerator cable / pot.
Built the front side battery box seen here, in 16 gauge steel.
Mounted the Soliton Controller at a double angle facing sortof up and toward the front of the car. And finally hooked up the motor HV wires and one battery cable coming from the rear pack.
I'm not putting anything else of size in front of this stuff because I want air flow, so maybe just a tunnel system of some kind if I ever think of what, any ideas?
The battery box will have a deep lid.
Thursday, August 7, 2014
sold the V8
The other day I managed to sell the V8 302 for $700. Was cheap but I'm happy with that considering I really can't give the buyer any good info on how reliable the motor will be.
I have been working on the motor mounts and plate for my electric motor and it is installed into the car. There is a gap there between the motor plate and the transmission bell housing, the gap is firm with some large bronze spacers, but really that is still a temporary solution (but strong enough that it could be permenent)
Regardless I will have to disassemble the setup to put in an aluminum flywheel or at least get the steel flywheel that is in there now balanced (Ford has a stock purposely imbalanced setup to compensate for internal motor imbalances)
-josh
Saturday, July 12, 2014
Changing over to FORD !
I recently bought a 1965 Ford Cortina (Lotus-Cortina) which is now in my garage and will be my new chassis for me EV conversion.
After 6 or 700 miles on the Volkswagen I decided to move to a more substantial chassis that can handle more batteries for longer range and be my only car! The VW has been good to me and convertibles have their addictiveness, but it is now gone, sold the chassis for 400 less than I paid for the car a year ago (also sold the motor when I first got it)
Anyway on to Ford, but wait... is it a Ford? Well yes made in England as almost all Mk1 Cortina's were, but it has our normal left hand driver side. pics please? well here is something...
This car has a 80's Mustang GT rear end (shortened) with T-5 transmission and V8 302 roller motor. Only the motor will need to be tossed out, it is super powerful but wasn't really well taken care of so I may just part it out so someone doesn't end up with an unknown situation.
So today I am removing the old gas tank which is a plastic racing style tank (this car was probably on the track at some point in the last 15 years) AND hopefully I can remove the V8 with my engine hoist. Since there was no A/C no P/S no Fuel Injection no Computer system of any kind, and no heater system, we are looking at a countable number of bolts to get this thing removed, I am hopeful!
Josh
After 6 or 700 miles on the Volkswagen I decided to move to a more substantial chassis that can handle more batteries for longer range and be my only car! The VW has been good to me and convertibles have their addictiveness, but it is now gone, sold the chassis for 400 less than I paid for the car a year ago (also sold the motor when I first got it)
Anyway on to Ford, but wait... is it a Ford? Well yes made in England as almost all Mk1 Cortina's were, but it has our normal left hand driver side. pics please? well here is something...
 |
| parked in my garage, 13" wheels, ya know, british style. |
 |
| V8 small block 302 roller motor that has to come OUT and be sold off |
 |
| shiny from the showroom of the dealership in Chicago (whom I don't like much) but anyway, it WAS clean then. they used bad shipping with no cover and now it is dirty :( |
This car has a 80's Mustang GT rear end (shortened) with T-5 transmission and V8 302 roller motor. Only the motor will need to be tossed out, it is super powerful but wasn't really well taken care of so I may just part it out so someone doesn't end up with an unknown situation.
So today I am removing the old gas tank which is a plastic racing style tank (this car was probably on the track at some point in the last 15 years) AND hopefully I can remove the V8 with my engine hoist. Since there was no A/C no P/S no Fuel Injection no Computer system of any kind, and no heater system, we are looking at a countable number of bolts to get this thing removed, I am hopeful!
Josh
Subscribe to:
Posts (Atom)