Monday, December 2, 2013

motor mount and axles in!

We used 3 existing motor mounts, one of them with a steel strap from hdepot, the others use the original mount hardware because they are attached to the trans.  Right now the trans has 2 mounts, the aluminum plate has 1 and the motor itself has 1.  Since the plate/trans/motor are in a way 1 single unit (they are NOT coming apart and they have zero independent movement from each other) it means 4 mounts for the assembly, but I still want a 5th mount that will be on the motor as well.  I'd like to attach some angle steel to the main lifteye bolt socket on the motor, it is the strongest mounting point of the motor and since it is right in the center of the engine compartment I could use that cross member to carry weight of things on top as well.  Just thinking anyway.

 Terrible picture but it shows the axle boot once attached, also... *frown* the partial shot of a c-clamp which is currently holding the brake vacuum res together which never needed to be taken apart, and also brake master cylinder *thingy* which has no fluid resevoir connected, that also never needed to be dismantled.  by me messing with them they are now pending items, grr.

Layed in some boards and some plywood that came with the batteries shipping box.  Just to get some possibilities going on the fit.

Movement became reality as I surprised myself with this by placing these items in there "just to see"

I'm not too keen on the controller being so close to the grill, but it will have to be shielded with some sheet metal if it were to stay there, which I doubt it will.  The Orion BMS is next to the batteries and could be swapped with the controller since it has no moving parts and probably generates less heat.


lowered engine/tranny inside etc.

 just some new tools and a side project, I used some spare wood to build a work bench
best dog ever


 Lovely girl booting up the controller for the first time, and adjusting the throttle settings

 lowering the engine in, I did this without help on Tuesday morning, stressed out from my daughters surgery I probably just needed to do something that I shouldn't be doing? who knows.
It ended up being harder to get situated than I would have expected.

pressure washer, kind of a nightmare to hook up since I wanted to use hot water from my hot water heater, and my hose from the front yard was still frozen and this thing kinda leaks water everywhere and it plugs into 110v and the on switch is down at the bottom where you feel you are about to get electrocuted, but I used it and it worked, still I don't think they are worth the trouble.
 engine finally in. this happened early last week.  many things have happened since!
This saw fest went really well, very easy compared to sawing the 1/2 aluminum which sucks.  Had to saw the exhaust off finally because it was dragging and I couldn't push the car back into the garage :(
And the completed work bench, or whatever it is supposed to be.  rolling cart?

Wednesday, November 27, 2013

out of sequence pics

The BMS (battery management system arrived in September I think), an expensive bit of equipment.  People who are on a tight budget sometimes skip this part.

Me drilling the aluminum adapter plate with NO drill press and NO vice.  lame? whatever.  I own a drill press now! 

brushes replacement

 Old brushes coming out one at a time.  They are just blocks of carbon with some wire.

 Me and the motor.

New brushes going in, they appeared "seated" already but I ran them on 12v a while anyway.

This all happened a few weeks ago, just getting the pictures off now.

Charger plug thingy

The Elcon charger shipped with a Nema 6-20 style plug which is designed for 220v 20amp max, I removed the plug and put on a normal 5-15 which is the normal household plug style for 110v, I did this knowing the charger has already been set to limit to 15amp max when plugged into 110v.  For now I will only be able to charge on 110v (until I decide what type of plug I want to use to get hooked up to my 220v dryer plug)

I plugged it in to the wall with the newly installed 110v plug and the lights came on and the charger indicated it was not connected to any batteries.

I also borrowed a pressure washer from my boss/client/friend John, to clean out the engine compartment.  As I tried to get it going to the water outlet on the hot water heater, I realized my hose was frozen due to being left in the front yard snow.  So I started on building a tool cart out of spare plywood and 2x4s.  I put on a new "metal blade" for the band saw and it worked great for wood even though it was purchased for trimming the aluminum plate, which has already been trimmed using Jori's reciprocating saw and some metal blades (designed for cutting metal).

My daughter is recovering from Tonsillectomy.  The recovery process is nasty, and progressing "less than optimal".

Monday, November 18, 2013


hola people,

Here is a video of the assembled motor/trans if you feel like seeing it:

Also here is a picture of the 12v test run with the trans connected.


turns out I was testing with very low tranny fluid which may be part of the noise plus with no drag on the tranny the gears kinda were flapping around, but when I put it in 5th gear is was very quiet.

There were some interim assembly pictures for this stage which I will post later.

Saturday, November 9, 2013

Received copper connecting bars and Elcon Charger


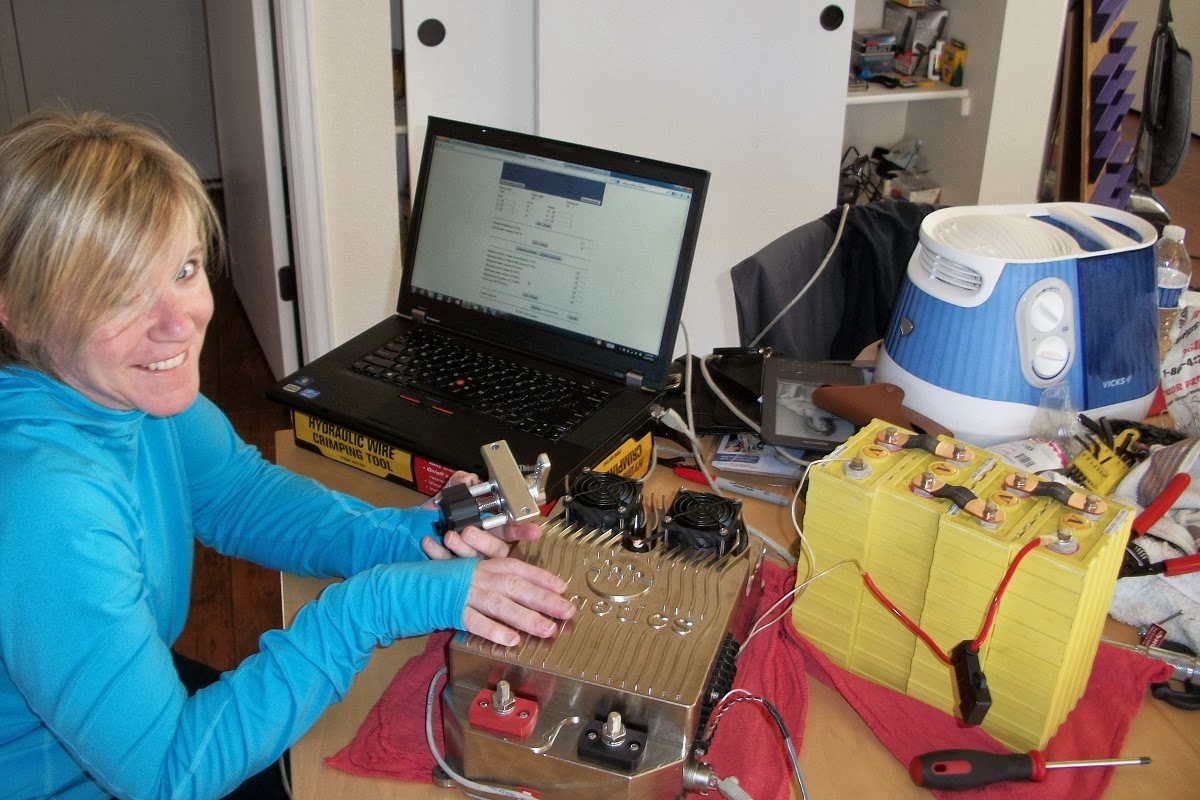
Jori with new Elcon charger in yellow, bottom right is Orion BMS next to copper connecting bars in black shrink wrap.

Newly arrived "bigger" crimper that can do 2/0 guage and much bigger even.


Turns out the biggest hydraulic crimper sold by Harbor Freight cannot do 2/0 lugs, it doesn't open big enough to put the lugs in, additionaly  the biggest hex setting it has is for 0 awg gauge.  I ordered one from Amazon that should be able to do it, the model is YQK-240A, so hopefully I'm all set there.
The copper connect bars/leafs arrived, they are really 3 leafs of copper held together with shrink wrap and they a hump so they offer some flex for battery expansion/movement. Look like they will work just fine.

So I need to clean the engine compartment and get the motor mounted alongside the axle, lets hope that fits.  Also I still need to put in the new brushes, I'll be making a video of that, the video's from the shop manual were very helpful.

The batteries shipped in two cases of 3/4" playwood, with lots of foam lining, since I have smaller batteries I will probably just try and leave the batteries in those cases and mount the wood to the frame (for now?).  Maybe 1 case in the back and one in the front?  Each case is about 160lbs, so I also could opt to put them both up front, we'll see.

I received my charger today, a 3kw Elcon version.  The Elcon charger along side an Orion BMS using the Canbus feature of each, will this be an easy setup?  Also I asked that the Elcon have the 15a limit set on the 120v setting, I don't know how I can use 240v, or also how I use a public charging station?

We used 3 copper bars to create a 12v battery out of 4 of the Lithium cells which measures 13.23 volts, I wanted to hook it up to the vacuum pump just to see something do something! but didn't get any wiring and we had to leave.

This weekend is also the broadcast of the Starcraft 2 year end finals, AND the MotoGP final race of the year in Spain, where the championship has not yet been decided, so that is creeping in on my time.